Did you know that it takes about 21 days for an egg to hatch? Though some eggs hatch a day or two early or late, you’ll find that Day 21 is usually the time when your eggs will hatch into adorable baby chicks.
Note: A “day” is measured in 24 hours, not days of the week.
If it’s your first time trying to hatch chicken eggs, you’ve come to the right place. You’ll learn how to hatch chicken eggs–both with and without an incubator–and by the time you’ve finished, you’ll know everything you need to know about helping your eggs to hatch!
How to Hatch Chicken Eggs
Here’s a complete, easy-to-follow guide on how to hatch chicken eggs like a pro…
Getting the Eggs
To get your hands on chicken eggs you can actually hatch, you’re going to need to visit a poultry farm, hatchery, or a hatching hobbyist. The eggs sold in supermarkets aren’t going to work! It’s best to get all of your eggs from the same source, as that will reduce the risk of disease.
Eggs are usually selected from special breeder hens, the healthiest hens with the highest fertility rates. Fertility rates vary from 55 to 95 percent, and you can expect at least 50 to 75% of the eggs you purchase to hatch. Hatcheries will usually “set” all of their eggs, but if you don’t have enough space to hatch all the eggs, choose only those of top quality.
- Find the eggs from the best breeders.
- Find only medium-sized eggs; small chicks are born from small eggs, and large eggs don’t hatch well.
- Avoid any misshapen eggs.
- Stay away from eggs that have a very thin shell, or any with cracked shells.
- Only clean eggs should be used for hatching–washing the eggs removes its protective coating and pushes pathogens through the shell’s pores.
Setting the Eggs
You should only set eggs that are both clean and undamaged into your incubator, as those are the eggs most likely to produce healthy, disease-free chickens. Your eggs should be set no more than a week after they are laid. More than 10 days and the chance of the eggs hatching decreases drastically!
Note: If you are having eggs shipped from somewhere else, let the eggs sit for 24 hours after arrival before placing them in the incubator. This will ensure the eggs’ contents settle.
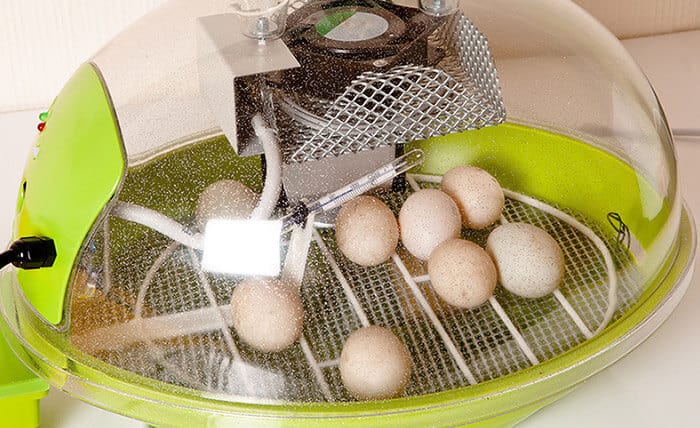
Before you place the eggs in the incubator, make sure that it is plugged in and fully warm. The temperature in the incubator should hover around:
- 99 and 99.5 degrees (in a forced-air incubator)
- 101 and 102 degrees (in a still-air incubator)
Keep a thermometer handy, as well as a hydgrometer to check the humidity in the air. You’ll want to keep the humidity somewhere around 45 and 50% for the first 18 days, then increase it to 65% for the final days of incubation.
Candling
Candling is a means of checking to see if an egg contains an embryo within. It’s as simple as holding the egg up to a light source in a darkened room. The egg shell is transparent enough that you should easily be able to see whether or not it contains an embryo.
- In fertile eggs, you will see a small black spot–the embryo.
- In infertile eggs, the contents will be clear.
- In an egg with a dead embryo, there will be a ring of blood around the yolk or a dark spot stuck to the shell.
You can candle the eggs at any time of the incubation process.
- Pale-shelled eggs can be candled starting at Day 3
- Dark-shelled eggs can be candled starting at Day 5
However, the best time to candle an egg is between Days 8 and 12. This is when the embryos are most visible!
Hatching Chicken Eggs in an Incubator
If you need an incubator, check out our incubator reviews here.
Once the eggs have been set, you need to turn them every 12 hours. This will ensure that the embryos within the eggs develop into healthy chicks. Use a marker (NON-TOXIC!) to mark an X on one side of the shell and an O on the other. That way, you can be certain you have turned the eggs over properly.
You’ll need to make sure that there is plenty of ventilation to keep the eggs dry. Without ventilation, the eggs will sweat, providing organisms a way to get in and damage the embryo. You will slowly open the vents in the incubator (as directed by the manual), until the vents are fully open in the final three days of incubation.
You may notice that an air bubble forms under the shell, in the larger end of the egg. This air bubble will allow the chick to breathe once it is ready to break through its shell. The air bubble will only form correctly if the humidity levels are managed properly. Too much humidity, and the air bubble will become too large–making the chick unable to hatch.
Follow the steps above, and the chicken should hatch healthy and strong!
Hatching Chicken Eggs Without an Incubator
It’s easy to hatch eggs in an incubator, but what do you do if you don’t have an incubator?
Step 1: Buy a plastic storage bin – You’ll want a plastic storage bin (Rubbermaid is usually a good choice) with a lid. Clear plastic is always best, as it will allow you to see the eggs within. Drill holes into the bin’s lid, ensuring that there is even ventilation throughout the box.
Step 2: Get the lamps – If you are hatching a few eggs, a single desk lamp (with adjustable gooseneck) will do the trick. You may need a second or third lamp if you cannot fit all of the eggs under the lamp.
Step 3: Set up the nest – A bit of sacking should serve as the base of your nest, and lay a soft towel atop it. This will provide the soft surface for the eggs to rest on as they hatch. Place the lamps inside the bin, and point the light directly at the center of the nest.
Step 4: Insert the eggs — Place the eggs inside the nest after marking them with their X and O. Turn on the lamp, and let the eggs incubate.
Step 5: Control humidity and temperature – To increase the heat on the egg’s surface, move the lamp closer. To increase humidity, spray water onto the eggs. Use a hygrometer and thermometer to ensure the temperature and humidity of the eggs remain consistent.
Step 6: Turn the eggs – You’ll need to turn the eggs more often in your homemade incubator–five times a day!
Incubation time will still hover around 21 days even with your homemade incubator.
And there you have it! Once the chicks are hatched you’ll need to start thinking about where to house them and right after you figure that out you’ll be wanting to know how you can automate managing them (because it’s a pain). Check out those articles, we’re here to help!